Assembly
with
Tom O'Shea
In this video Tom discusses how to complete the final assembly, teaching how to drill and measure accurately. The notching from the last video and these final steps ensure a stable and perpendicular table.
Get creative with the table top, you can use timber slats, recycled concrete, off-cuts from an old bench. The options are endless.
Materials
-
Prepared timber from the last video
-
Drill and sharp drill bit that matches your chosen bolts
-
[Optional] Dowel jig
-
Metal ruler or gauge
-
Socket for tightening bolts
-
8 bolts and nuts
Assembly
Instructions
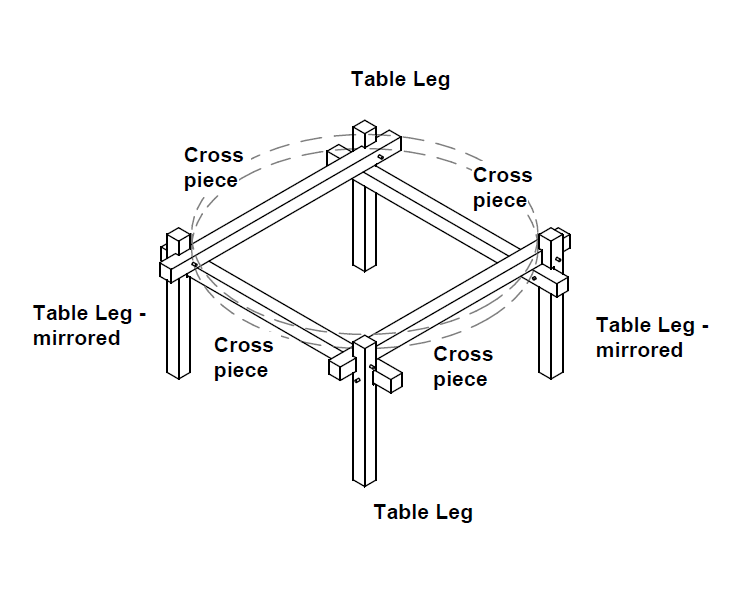
You will need to have the four legs and four cross braces cut and notched from the last video.
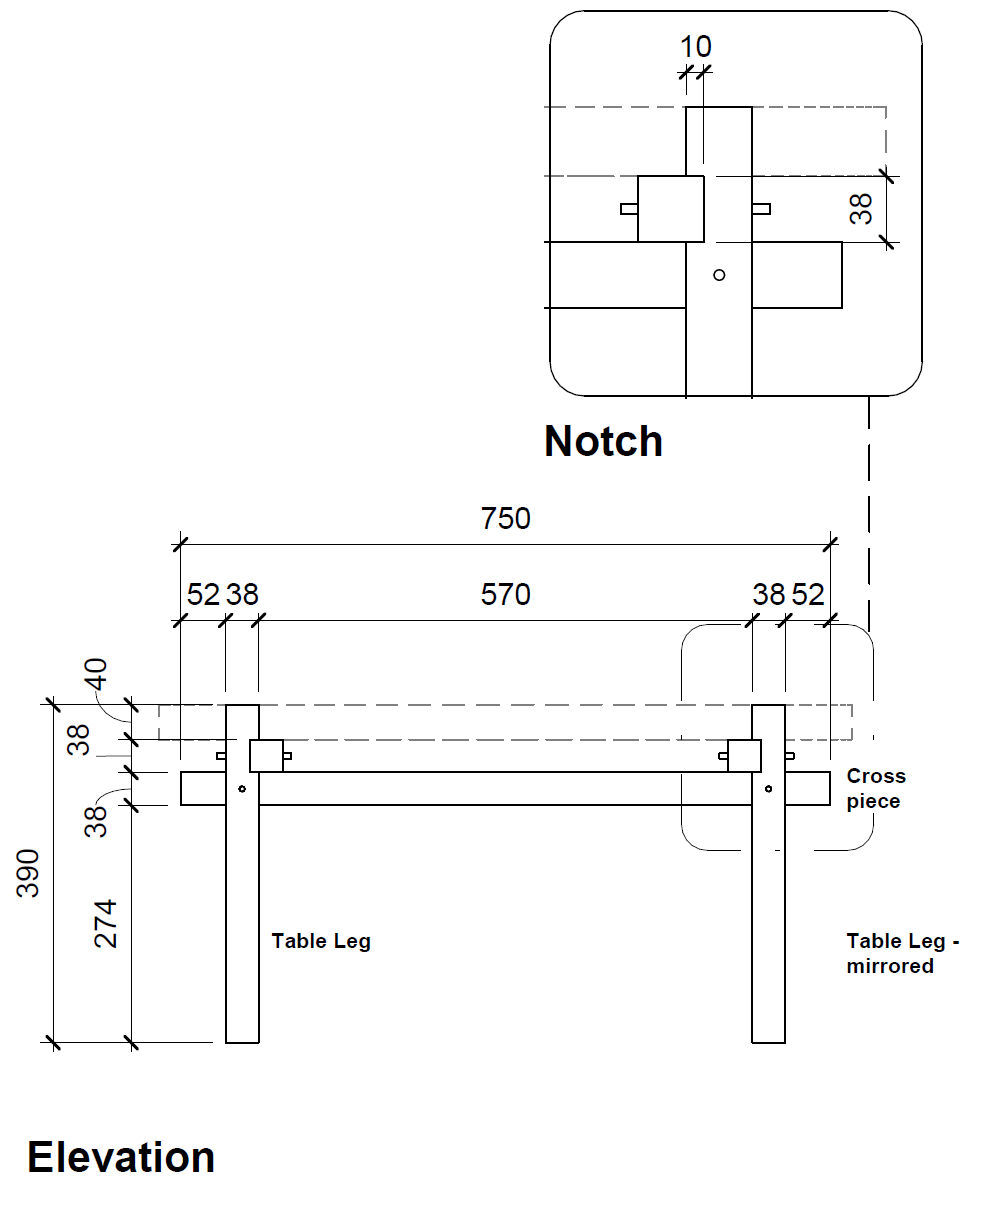
Diagrams, assembly and 3D reference images are available below.
Measure
-
Take the four cross braces and locate notches.
-
Find the centre-line along the long direction of the timber, on the opposite side of the notches.
-
Measure to where the centre of the notch is then on the opposite side of the timber make a mark with a gauge or ruler - this will be used to locate the leg.
TIP Take your time and double check all measurements
Do a dry run fitting
-
Make sure the leg is on the outside
-
Continue making marks on all notches
Drill and bolt the pieces together
-
Drill through marked place
-
Clamp the timber in place - use a scrap piece of timber to hold the timber together to stop bruising
-
Drill through marked place The 50mm line should line up with the leg
-
Bolt the pieces together immediately and finger tighten
Repeat with the other joins
Stabilise
-
Tighten all bolts - making sure they’re firm but not too tight
-
Use some super glue for extra stability
-
Test for wobbles, and you're done!
You can use any table top
Tom suggests to repurpose an old bench or decking panels.
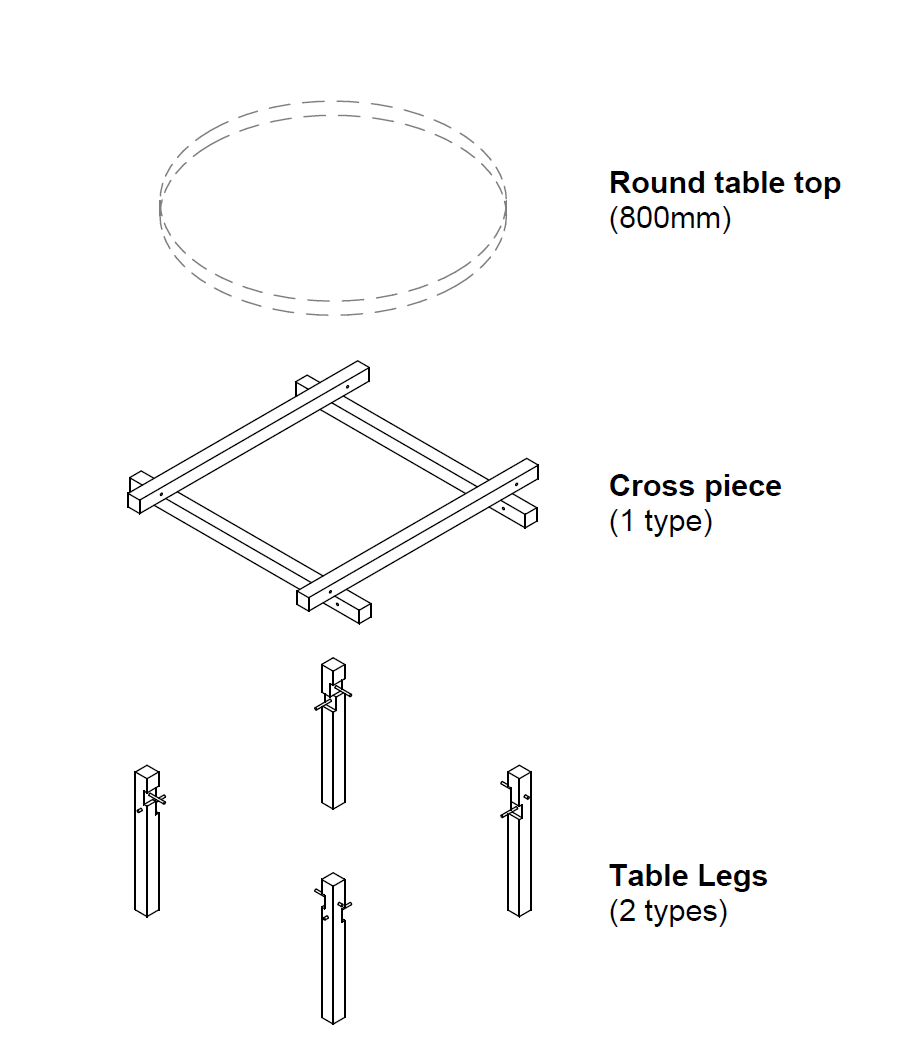
Diagrams
Click on the image to view the image in original resolution.